November 2017
What’s New?
•Converse Desktop, an intuitive, intelligent Desktop that sorts and filters conversations for users, making it a snap to quickly locate and respond to messages from a variety of different clients.
•Use the Scheduling feature to send individual and bulk distributions from the List views in both Classic and Lightning.
•Send messages from Campaign in Salesforce Lightning.
•Optionally configure a default Sender ID - for individual users and user profiles.
•Sender ID and Phone Number Labels.
•Configure permissions.
•Additional enhancements.
Compatibility
SMS-Magic Interact 1.48 is compatible with Salesforce Winter ’18.
Converse Desktop
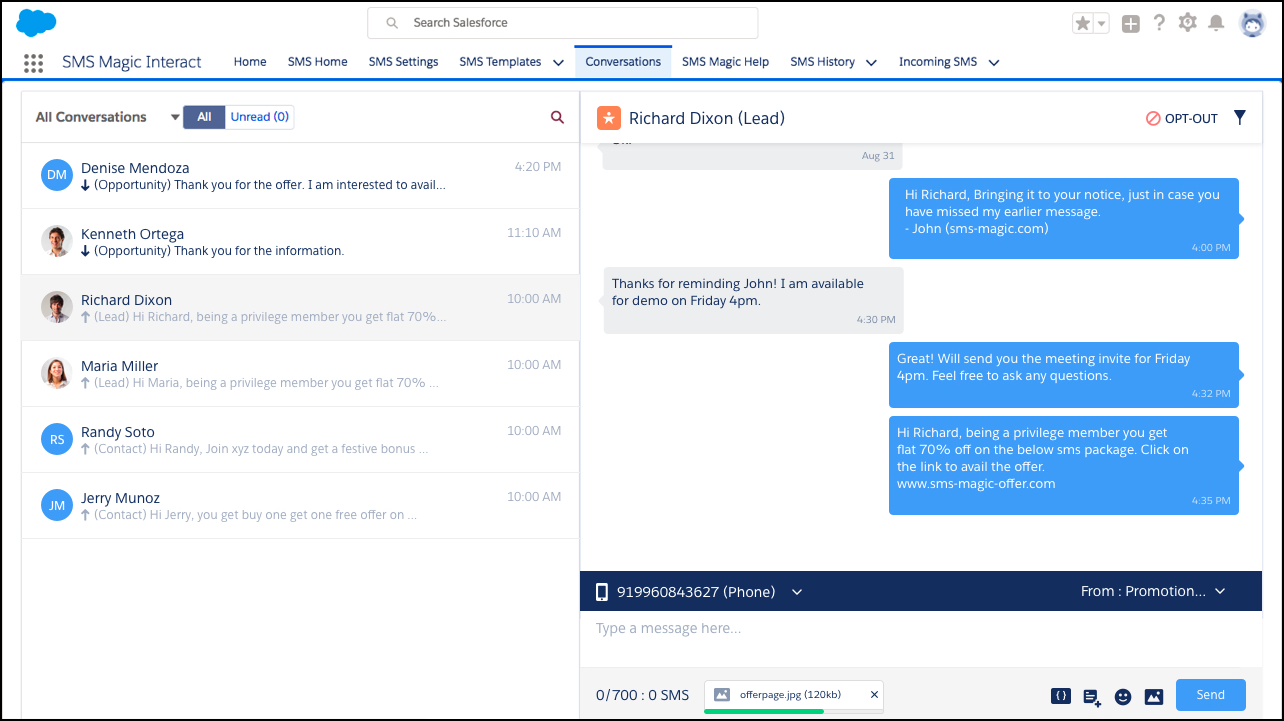
Now, you can converse with all your prospects from a single interface. SMI 1.48 brings you the Converse Desktop, a feature that gives you the ability to view all the conversations for each record — within a single screen. You’ll also enjoy new capabilities for searching and filtering the conversations that you want to view, and then perform CRM actions such as creating a lead or a task from the same view.
Instead of opening different records to view the messages that you exchange with your contacts, you can do all of this in a single page — and save time and effort.
See the figure below for a view of the Converse Dekstop.
Schedule messages from Lightning
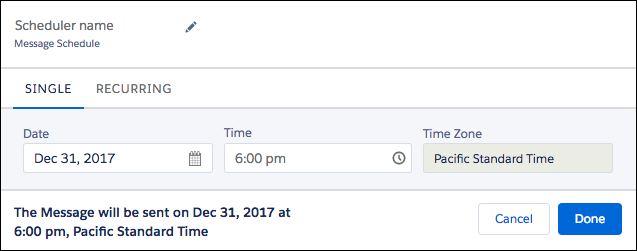
You can now schedule outgoing messages from the Lightning-compatible Single and Bulk Send pages. You can set a one time distribution, or configure a recurring schedule according to your needs.
SMS Campaign in Salesforce Lightning
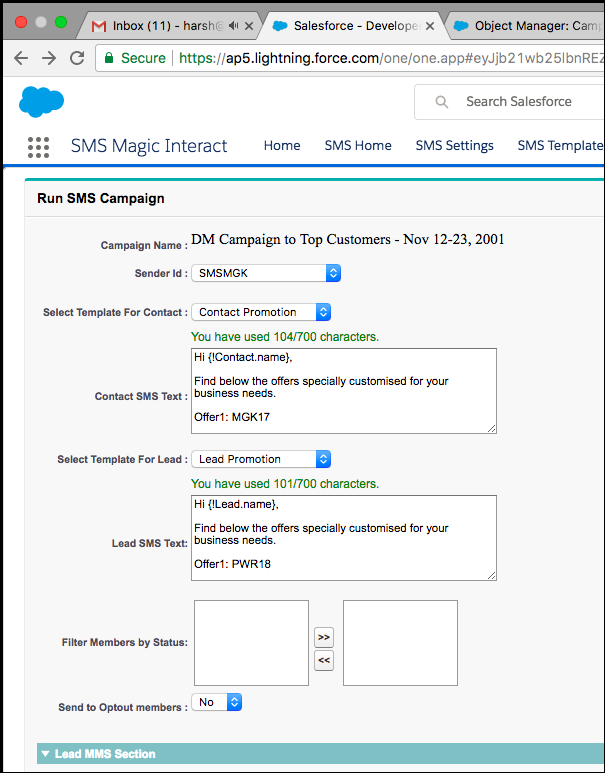
The SMS-Magic Interact package 1.48 now supports sending SMS messages through the Campaigns feature in Salesforce Lightning.
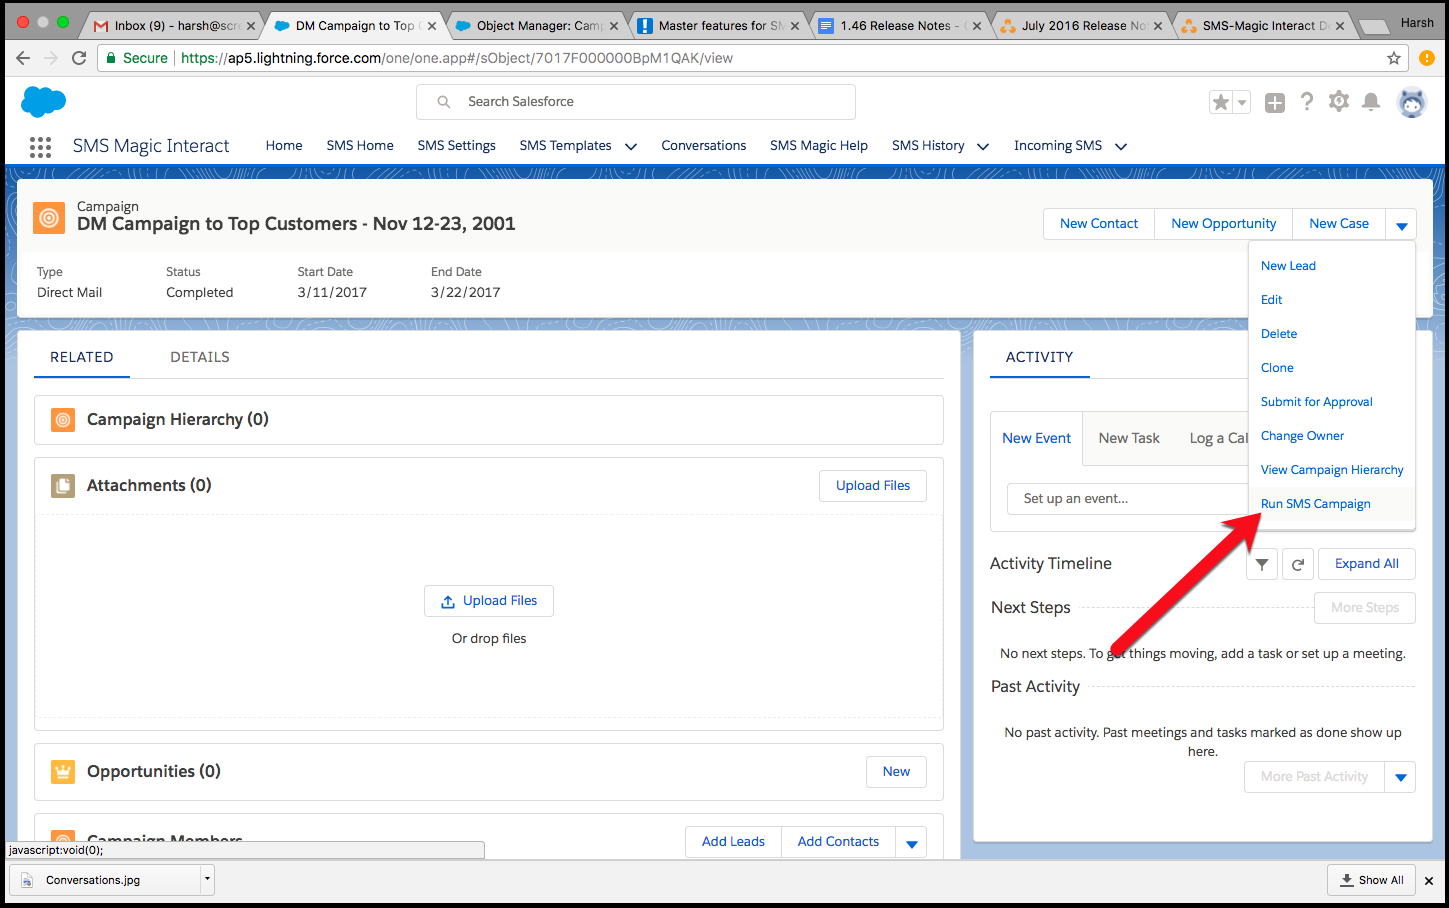
Follow these steps to add Run SMS Campaign button on the page layout:
1.Navigate to Object Manager > Campaigns.
2.Go to Page Layout and edit the Campaign Layout.
3.From the Mobile & Lightning Actions, drag and drop the Run SMS Campaign button to Salesforce Mobile and Lightning Experience Actions.
4.The Run SMS Campaign button will now be available in the Actions drop-down in Campaigns.
SenderId/Phone Number Labels
With SMI 1.48, you can add a Sender ID label to the Sender IDs in your Salesforce organization. Add a custom label to a Sender ID, so that it can be used as a reference to understand the intent of the Sender ID.
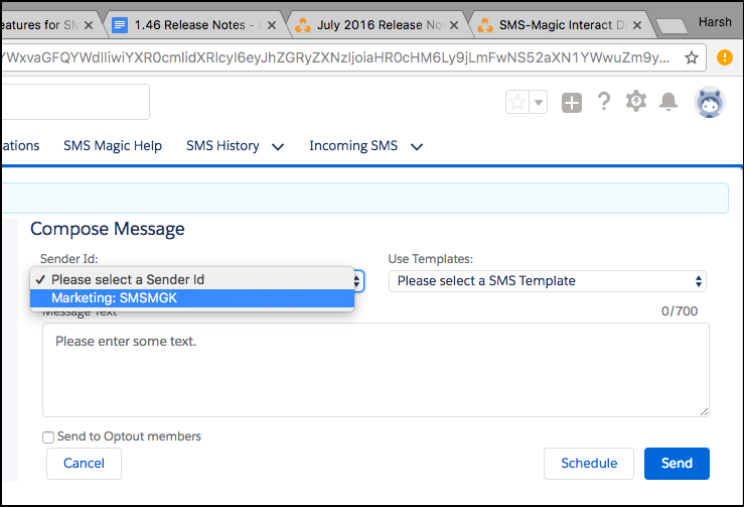
Follow these steps:
1.Navigate to SMS-Magic Interact > SMS-Settings.
2.In Basic Settings, go to Sender IDs and click on New SMS Sender ID.
3.Edit the layout for the New SMS SenderId page, and add the field Label from Fields.
4.Now you can create a Sender ID and add a Label to it.
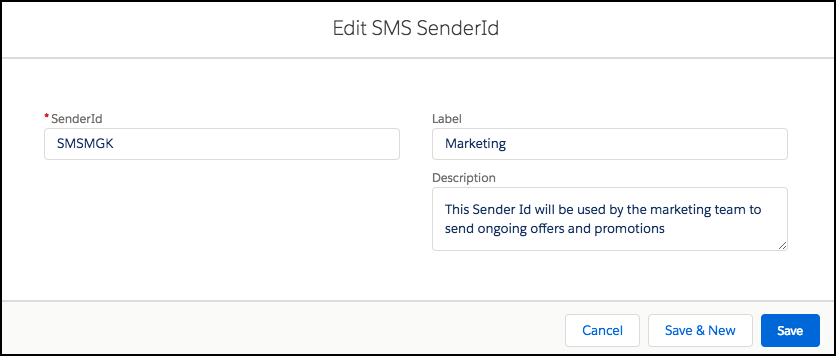
When a user selects a Sender ID when preparing to send a message, s/he can see this Label.
NOTE: Your contacts won’t see the Sender ID Label. They will only see the Sender ID by you. The Sender ID label is only for your reference. |
Configure default Sender ID for Profile and Users
With SMS-Magic, you can also configure a default Sender ID for individual users or user profiles in your organization. These configuration steps are similar to the configuration of default Sender ID for Profiles.
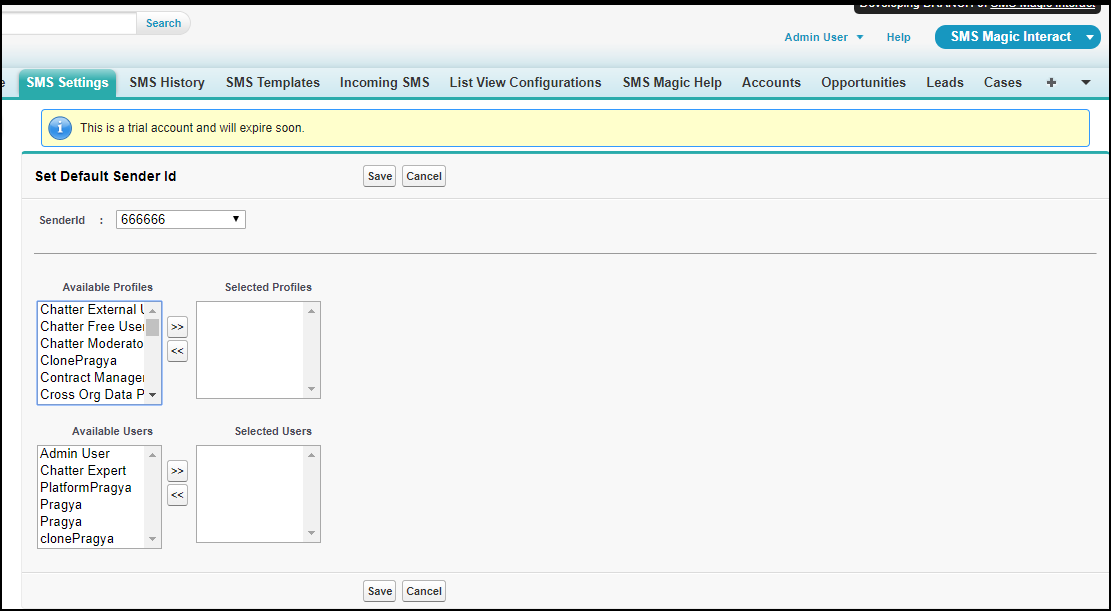
Follow these steps:
1.Navigate to SMS-Magic Interact > SMS-Settings.
2.In Basic Settings, go to Sender IDs and click Set Default.
3.From the drop-down, choose the Sender ID for which you want to configure Profiles and Users.
4.Select from the available Profiles and Users to configure the Sender ID as default for the selected Profiles and Users.
Custom Permissions and Settings
With this custom permission, you can manage message granularity:
SMS Magic Interact.smagicinteract.AllowToChangeMessageGranularity
If a user is granted permission, that user can manage filter settings found in Custom Settings (Conversation View Setting). Such users can view the My Messages and Default Sender filters in the Filter section in the Conversation Tab.
Any user for which this custom permission is not granted may only view the basic message types in Custom Settings.
Visualforce Page Creators
Now, with a single mouse click, you can create Visualforce Pages that are necessary for configuring the Conversation View and Bulk SMS pages in Salesforce Lightning. In SMI 1.48, we introduce two components, Create Bulk Page and Conversation View Creator to help you quickly configure these Visualforce pages.
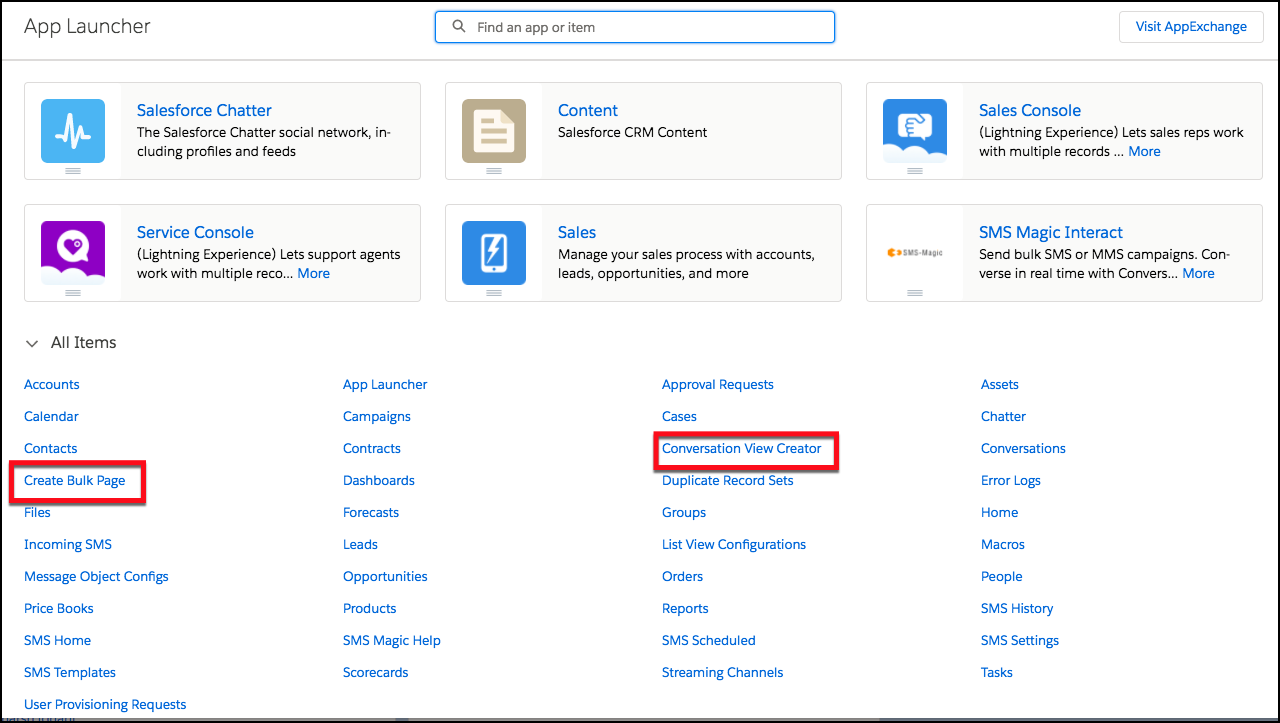
Other Enhancements
Description field on SMS Template
Using a merge field in an SMS Template provides a personalized touch, and also saves time and effort. At times, it may be difficult to understand the intent of the SMS Template if there are many merge fields.
You now have the option to enter a description for the SMS Template that you create. Simply enter a description so that you can understand the intent of the templates created.
No Character Limit on SMS Template
Using many merge fields in an SMS Template might consume unnecessary space, especially when the merge field or the object name is quite long.
For example, a merge field for the Opportunity Object (Delivery/Installation Status) might look like “{!Opportunity.deliveryinstallationstatus__c}”, but the actual value might be “Completed”.
To accommodate such situations, SMI 1.48 does not limit the character count when creating SMS Templates.
Permission Sets
SMS Interact Template Author — assign this permission set to provide permissions for objects and fields to users that need to edit and create SMS Templates using SMS-Magic Interact.
SMS Interact Conversation User — assign this permission to provide permissions for objects and fields to users that need to send messages using SMS-Magic Interact.
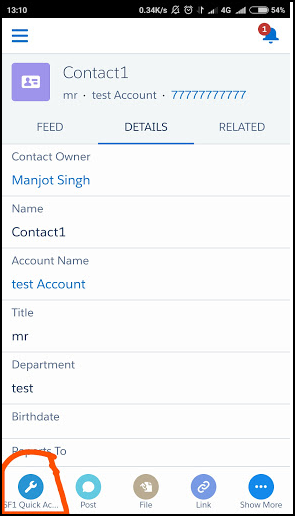
Chatter Notification and Quick Reply — In Salesforce1, you can easily reply to an incoming SMS with a single click button. Configure a Quick Reply button on your chatter notification so that users can respond to the incoming message from within the incoming notification.
NOTE: A notification will be sent to user only when the record owner is not the same as the user creating the record. |
Configure Converse Desktop on your Salesforce1 app to quickly reply to incoming texts and easily view your text interactions with contacts. Simply add a button in Salesforce1 Quick Actions.