The SMS-Magic Interact July ’17 Release gears you up for the Conversation Economy. SMI 1.47 comes with features that helps you harness the power of Conversation and provides access to such tools on your fingertips. This release not only empowers your sales and marketing team to connect with their prospects quickly but also brings powerful CRM actions on a single interface.
Features Introduced:
1.Conversations - A single platform to connect with all your prospects & perform CRM actions
2.Sender ID Labeling for mapping your Sender Ids with Intent
3.Custom Permissions and Settings to manage the access and granularity of conversations
4.Visualforce Page Creators
5.Other Enhancements
1. Conversations
Now converse with all your prospects from a single interface. SMI 1.47 brings you ‘Conversations,’ a platform that allows you to have a look at all the conversations you had with your records in one place. Not only this, it provides you capabilities to search and filter the conversation you wish to view and take CRM action (such as create a Lead or Task, etc) from the same view.
So instead of opening different records to view the messages exchanged with your customers, do it in a single frame and save time and effort. Here’s what ‘Conversations’ looks like:
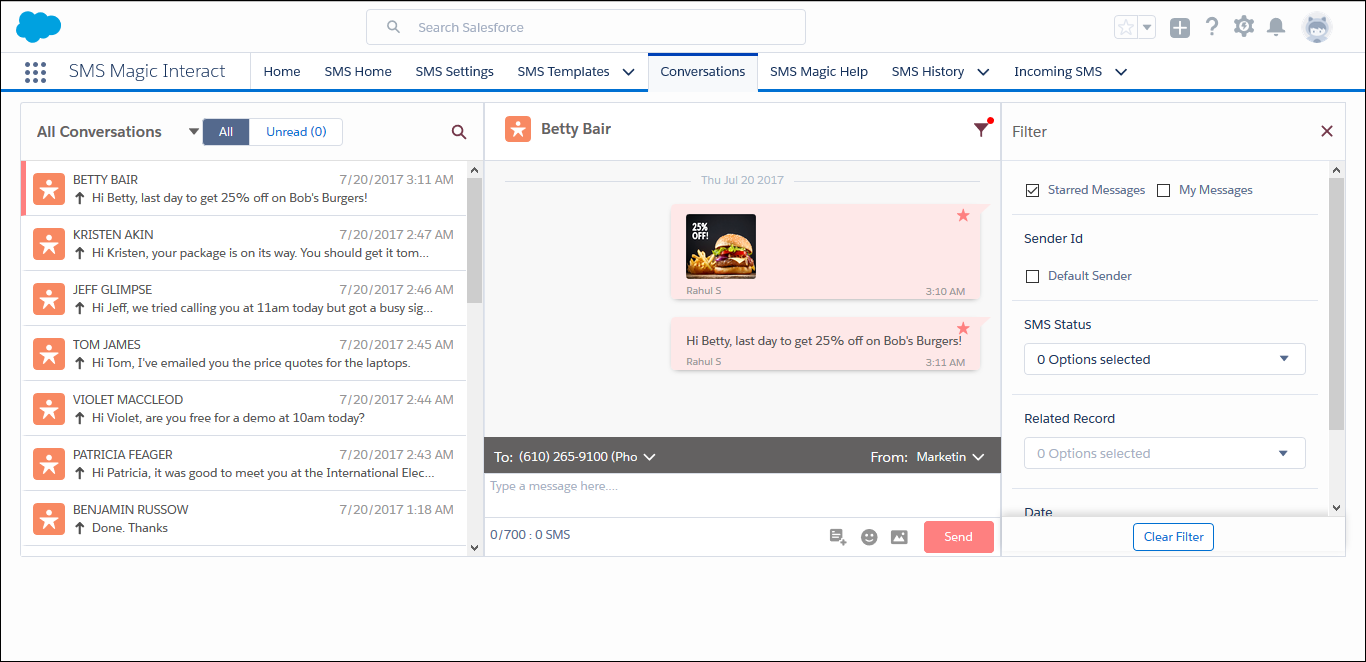
Action Required: None. A new component titled as ‘Conversations’ is introduced along with SMI 1.47 package.
2. Sender ID Labeling
SMI 1.47 provides capabilities to add a Sender ID label to the Sender IDs created in your Salesforce org. Give any custom label to a Sender ID so that it can be used as a reference to understand the intent of the Sender ID.
For example, a company uses 547889 as a Sender ID to run marketing campaigns and 567783 as a Sender ID to connect with leads. In order to make life simple, add a label ‘Marketing’ with Sender ID 547889 and ‘Sales’ with Sender ID 567783 so that your users can easily understand which Sender ID to use while sending out messages to your Leads or to your marketing campaign prospects.
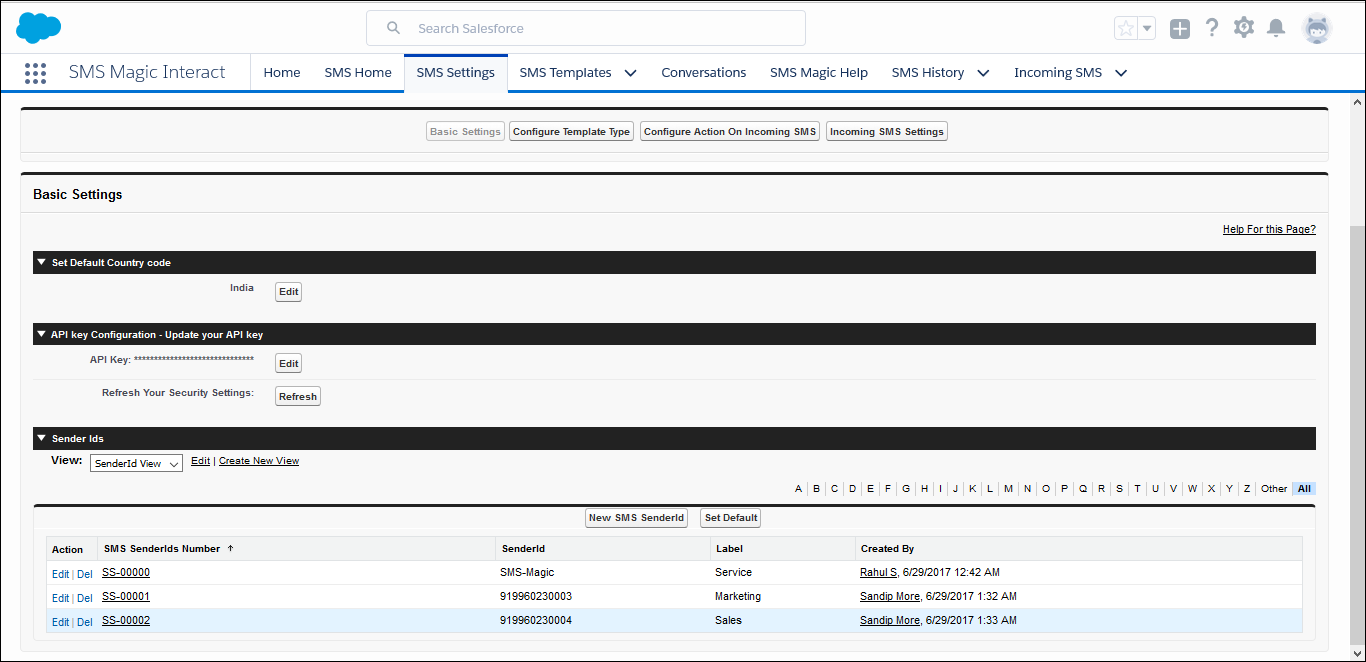
How it works
1.Go to SMS-Magic Interact
2.Go to SMS-Settings
3.Under Basic Setting, go to Sender Ids and click on New SMS Sender ID
4.Edit Layout for ‘New SMS SenderId’ page, and add the field ‘Label’ from Fields
5.Now create a Sender ID and add a Label to it
Going forward, whenever a user selects a Sender ID while sending a message, he will be able to see the associated Label.
Note: The SenderID Label will not be displayed to your customers. They will only see the Sender ID configured by you. The Sender ID label is just for your reference.
3. Custom Permissions and Settings
Custom Permission - “SMS Magic Interact.smagicinteract.AllowToChangeMessageGranularity”: Allows to manage message granularity.
This Custom Permission allows users to manage filter settings at granular level i.e. if the permission is granted then users can manage the filter settings configured under Custom Setting (Conversation View Setting). Users will be able to view ‘My Messages’ and ‘Default Sender’ filters under the filter section in Conversation Tab.
Whereas, if this custom permission is not granted then users will only be able to view the message types that are configured under the Custom Settings.
By default, this Custom Permission is not assigned to any Profile or User. Admin is required to manually assign this Custom Permission.
4. Visualforce Page Creators
Now with a single mouse click, create Visualforce Pages required to configure Conversation View and Bulk SMS. We have introduced two components ‘Create Bulk Page’ and ‘Conversation View Creator’ with SMI 1.47 to help you quickly configure the Visualforce pages required to configure Conversation View and Bulk SMS in Lightning view.
Go ahead and give it a try!
5. Other Enhancements
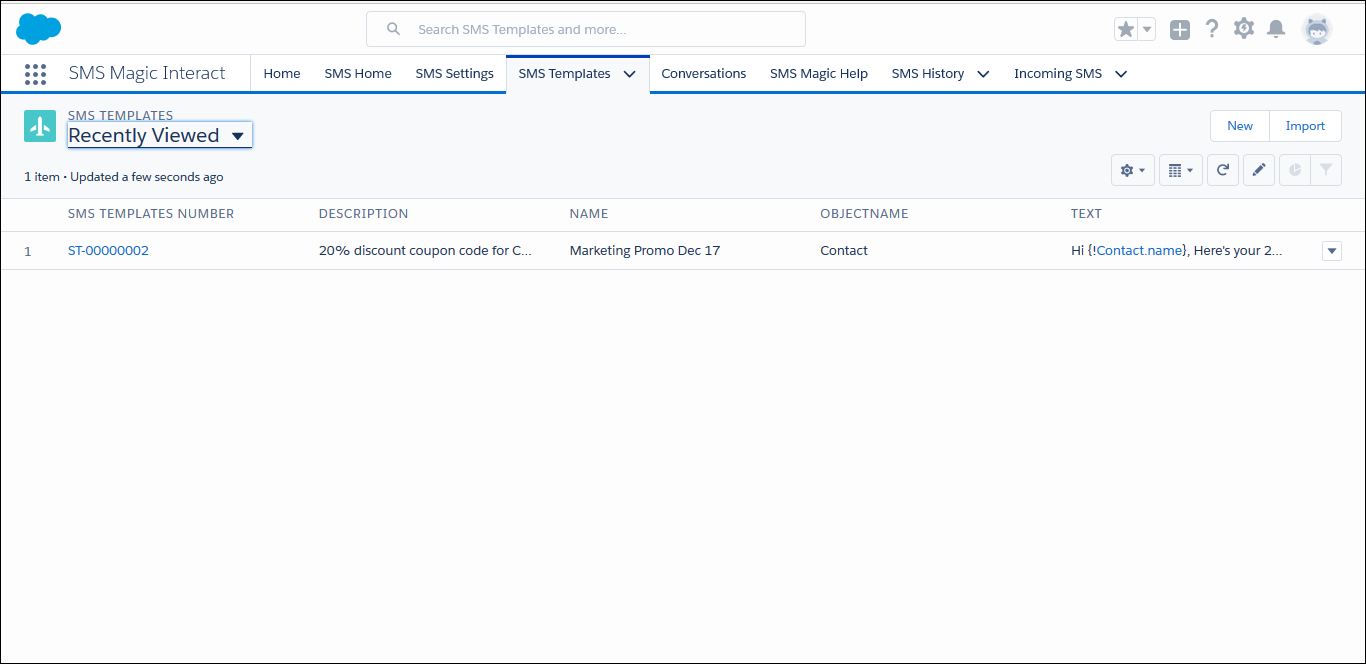
1. Description field on SMS Template:
Using merge field in an SMS Template provides a personalized touch but also saves your time and effort. At times, it gets quite difficult to understand the intent of the SMS Template due to many merge fields.
We now provide an option to enter a description for the SMS Template you create. Enter a description so that you can understand the intent of the templates created, in a jiffy.
2. No Character Limit on SMS Template:
Using merge fields while creating an SMS Template could consume unnecessary space specially when the merge field or the object name is too long.
For e.g. A merge field for Opportunity Object (Delivery/Installation Status) might look like ‘{!Opportunity.deliveryinstallationstatus__c}’ but the actual value might be ‘Completed’.
Hence we have removed the limitation on the character count while creating SMS Templates.
3. Set up message object configuration to manage optout and phone number fields for Custom objects. You can now manage opt-out configuration for custom objects.
4. Chatter Notification and Quick Reply: On Salesforce1, reply to an incoming SMS with a one click button. Configure a Quick Reply button on your chatter notification so that users can respond to the incoming messages from the incoming notification itself.
Note: Notification to user will only be sent when record owner is not the same as the user creating the record.
5. Configure Conversations on your SF1 app to quickly reply to incoming texts and easily view your text interactions with buyers. You can do so by adding the button under SF1 Quick Actions.