
Configuring SMS-Magic with Zoho
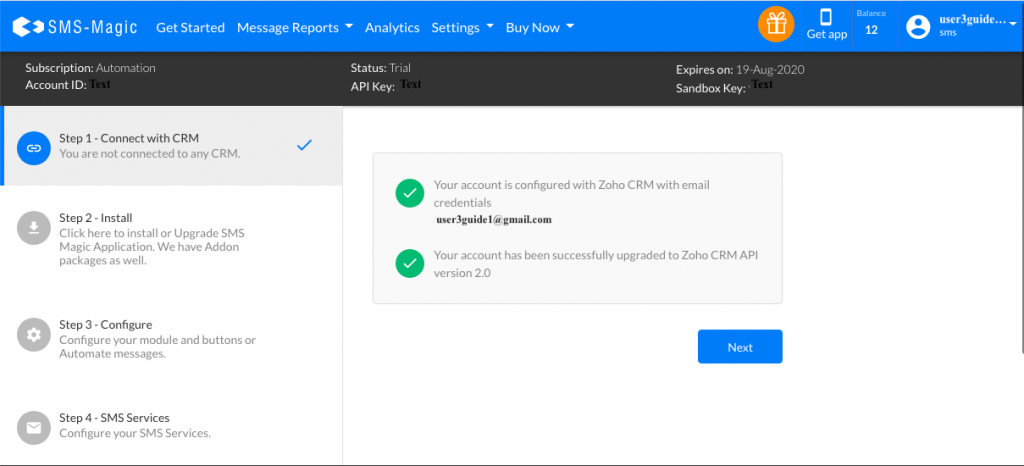
If you have logged in using Zoho CRM SSO, your account will be automatically configured with Zoho CRM.
NOTE: If you have not already installed the SMS-Magic Interact on Zoho CRM, click on Install and follow the steps mentioned in Installing SMS-Magic on Zoho CRM.
Re-login to SMS-Magic Web Portal, In the ‘Get Started’ section, click on the Configure Wizard to view the modules that have been created in your Zoho account.
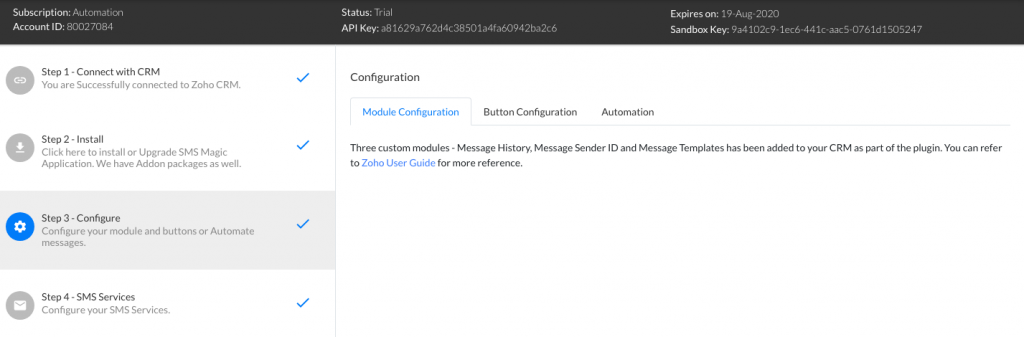
Notes: Do not delete or modify any of the Zoho Module Names. These names must remain as-is for SMS-Magic to work correctly with Zoho CRM.
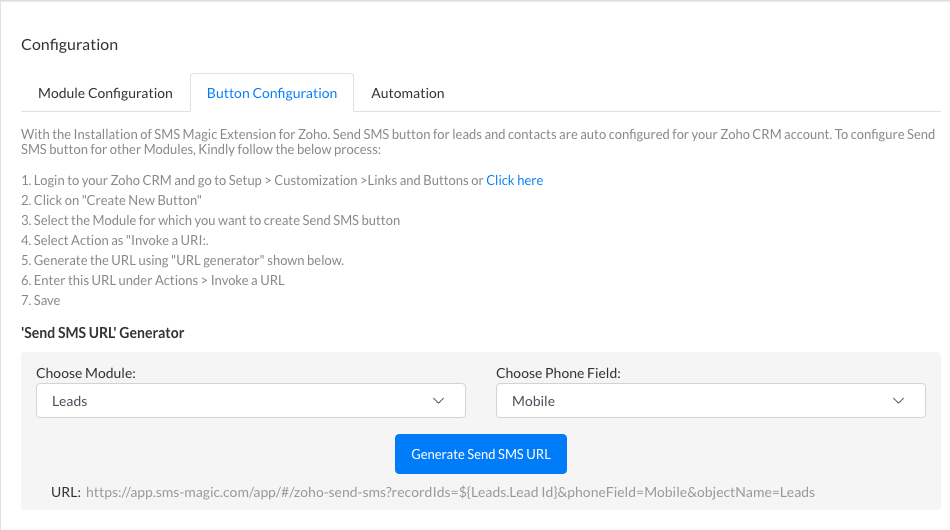
- In the Button Configuration tab, you’ll find instructions on how to create the Send SMS button for Zoho CRM.
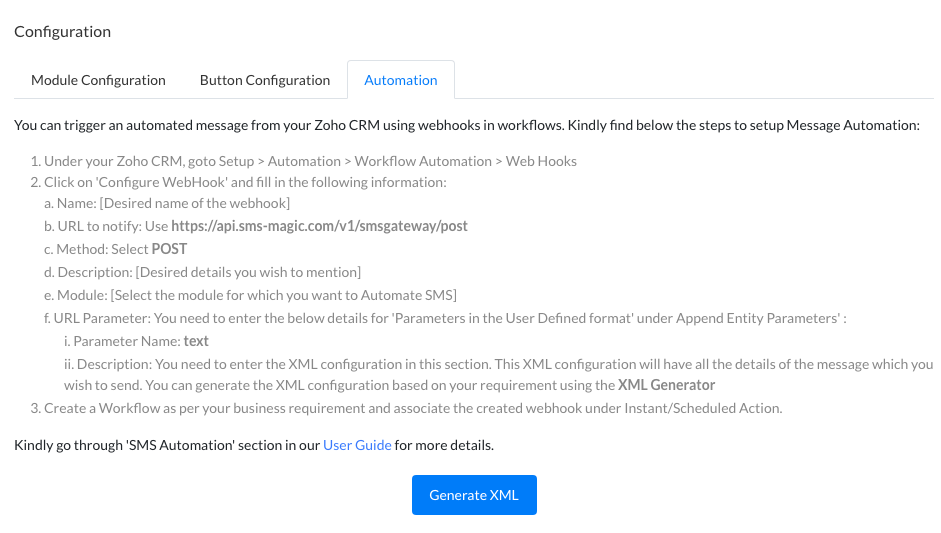
- The Automation tab provides information on how to use Webhooks to Send SMS Messages from workflows. You may proceed with these steps.
Setup and configuration is now complete. You are all set to begin using SMS-Magic. To learn more about SMS-Magic Extension, please refer to our User Guide.