Setup Email Services
You can configure the Email Services to handle the inbound messages. Perform the following steps to manually set up Email Services:
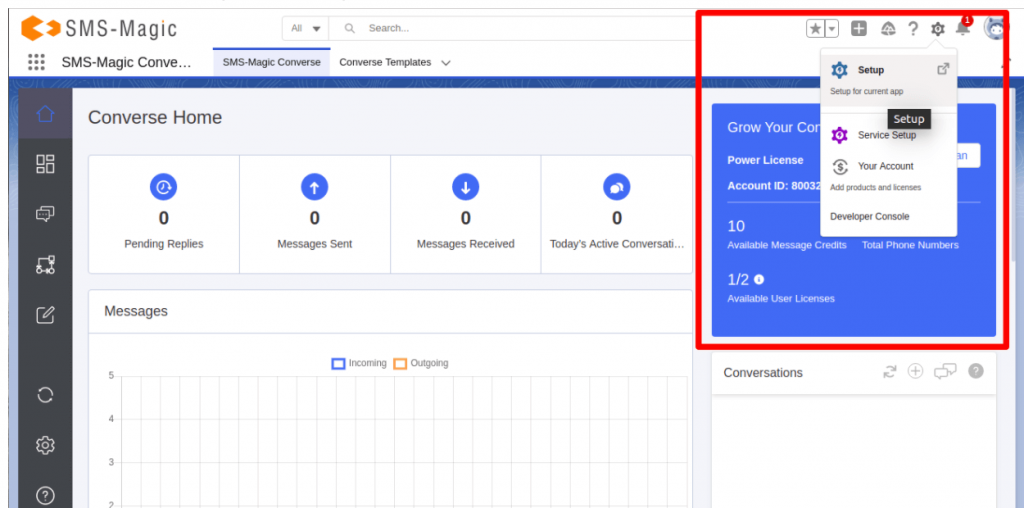
- Click on the ‘Settings’ icon on the Salesforce navigation bar and then click on the ‘Setup’ button
- Select Email Services in one of the following ways:
- Use the Search Setup/Quick Find search field, or
- Select Platform Tools > Custom Code > Email Services
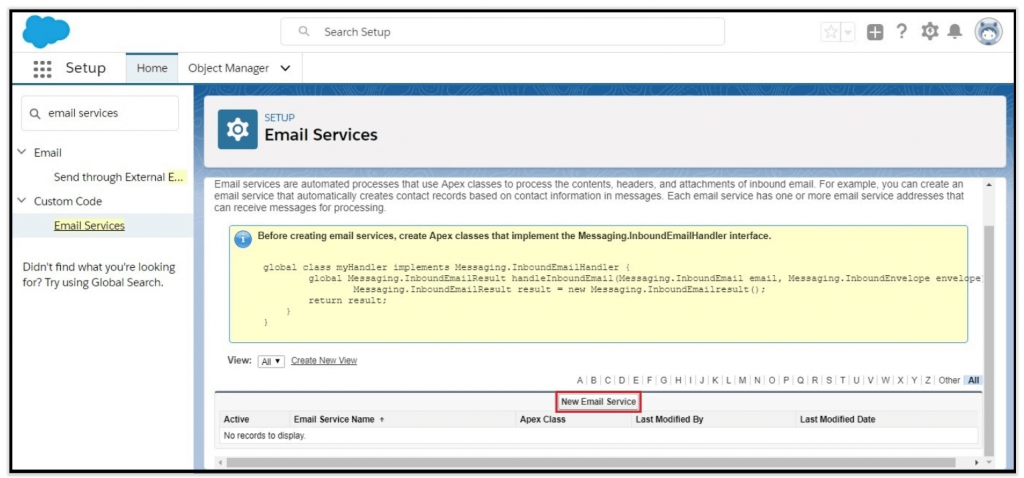
- Click on the ‘New Email Service’ button as shown in the image below:
- The following window will appear:
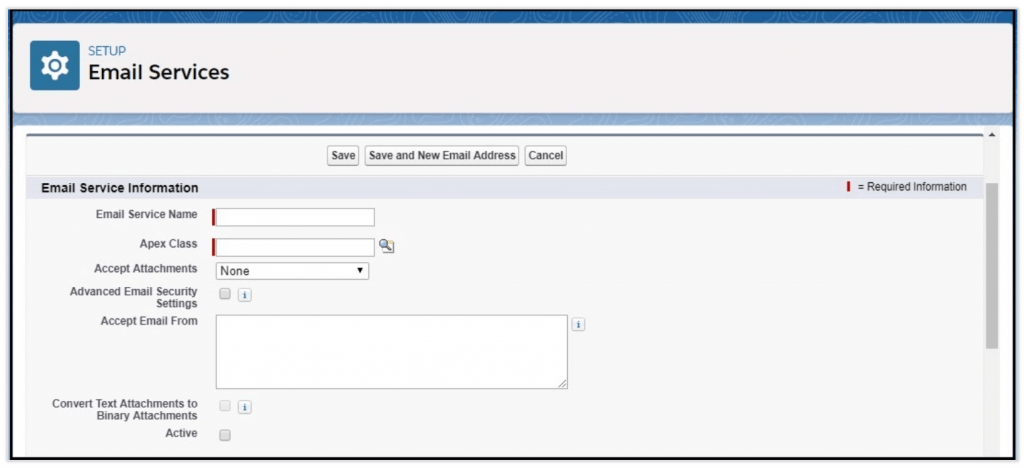
- Enter ‘NotificationReplyService’ in the ‘Email Service Name’ field. This is a mandatory field.
- Enter ‘EmailToTextServiceHandler’ in the ‘Apex Class’ field. This is a mandatory field.
- Do not enter values in the ‘Accept Email From’ text box
- Click on the ‘Active’ checkbox to enable the email services
- Click on the ‘Save and New Email Address’ button. If the user gets the following error while creating an email service:
Error: The Apex class selected is not valid. An apex class that implements the Messaging.InboundEmailHandler interface must be selected.
Follow the below additional steps to complete the configuration
- Go to the ‘Setup’ page in the org
- Search ‘Apex Classes’ in the quick find and open the page
- Click on the ‘Compile all classes’ link and wait until it finishes compiling
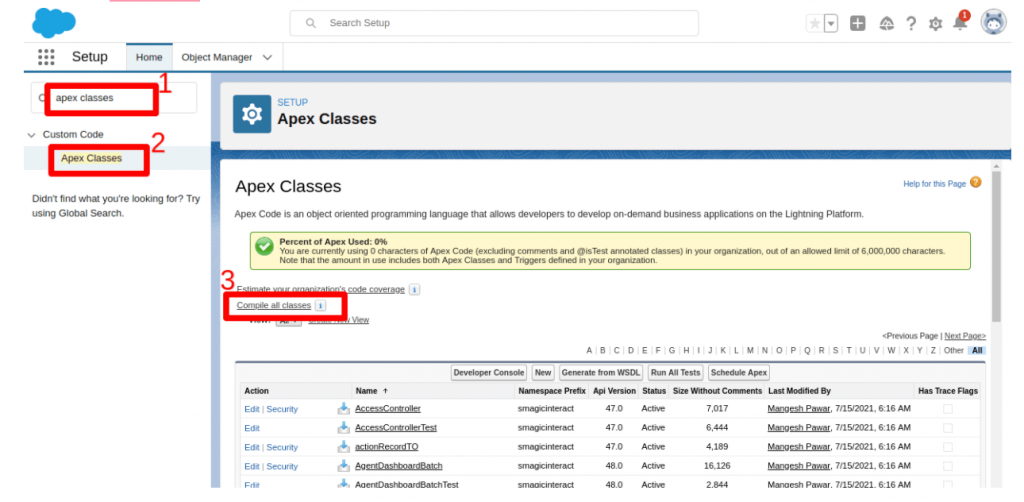
- Once the compilation is complete, you will get the following message saying, ‘Compilation Complete’:

- Go to the email service page and now try to save the email service. The following window will appear:
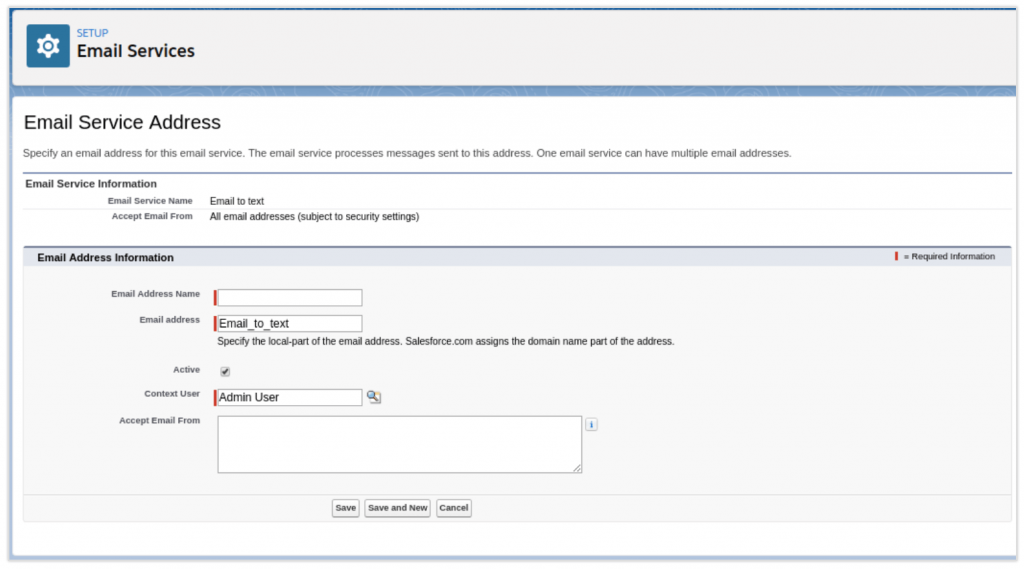
- Enter the name in the ‘Email Address Name’ field and click on the ‘Save’ button. The following window will appear:
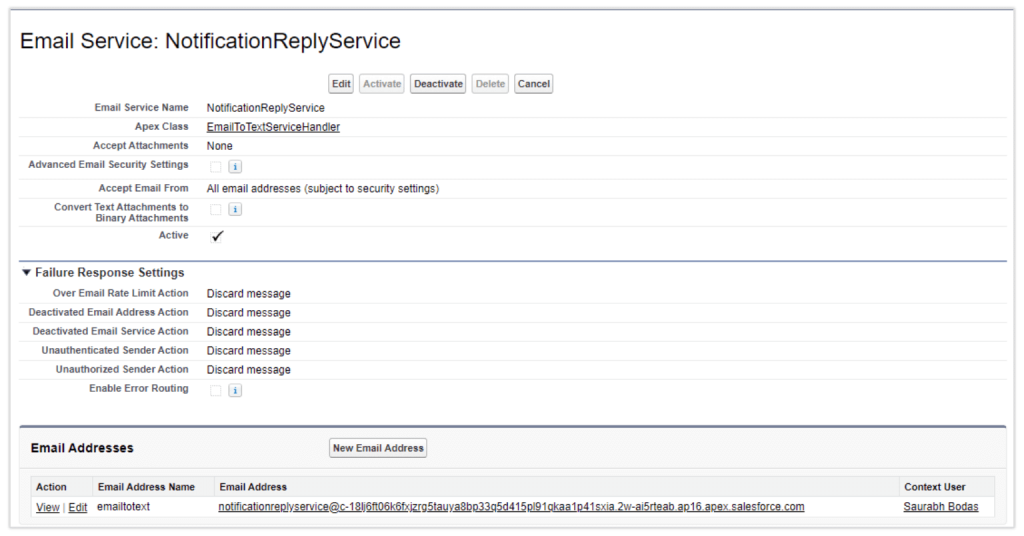
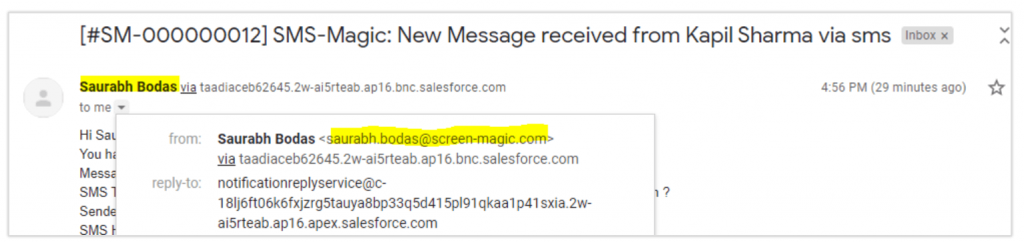
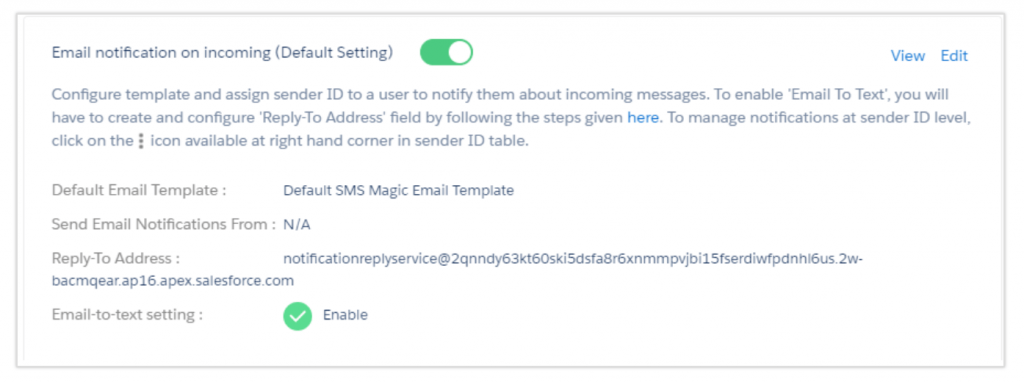
- Once you complete the email notification configuration as mentioned in the following ‘enable notification’ section by selecting the newly created email service address against the ‘Reply-To address’ field, upon receiving an incoming message, the system will send the email notification to the user assigned with Sender ID.
When the ‘Send Email Notification From’ field is not configured, you will see the oAuth user email address as ‘From email ID’ and you will see the above created ‘Reply-To address’ in the ‘Reply-To’ email ID field in the email composer as shown below: