Message Configuration
Here is the step by step video to Message Configuration
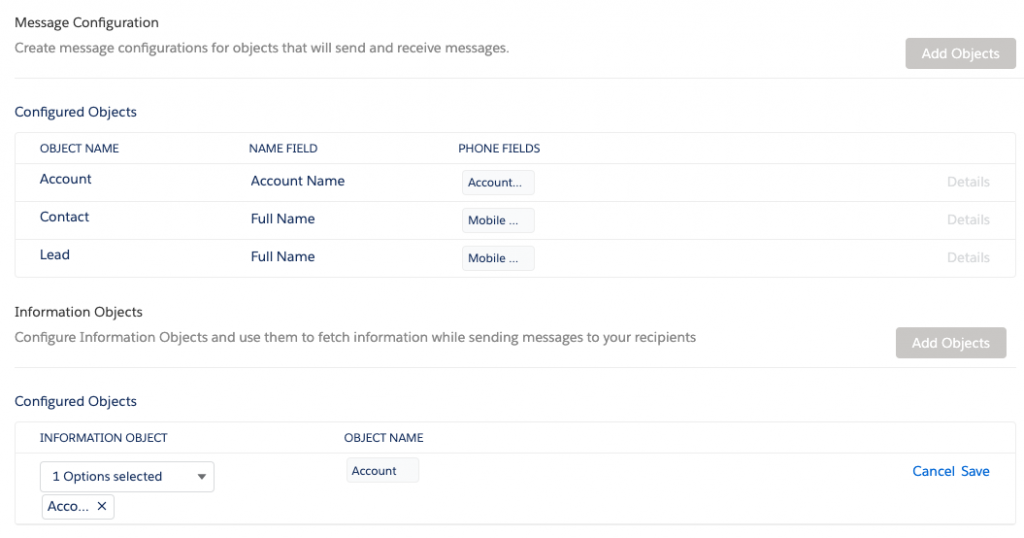
Choose who you want to Message and from which Objects. Message Objects are objects from which you can send SMS. In salesforce, you can choose your standard and custom objects from which you want to trigger SMS. You can choose one or more phone number fields to send messages to. We support up to 7 mobile phone fields on one object.
In the Message Object Configuration section, you can do the following:
- Define objects for which the user defines conversation templates.
- Auto-generate Conversation and Bulk Sending pages based on the objects defined.
- Define the use of mobile fields and name fields.
- Configure setup buttons using the pages that are generated.
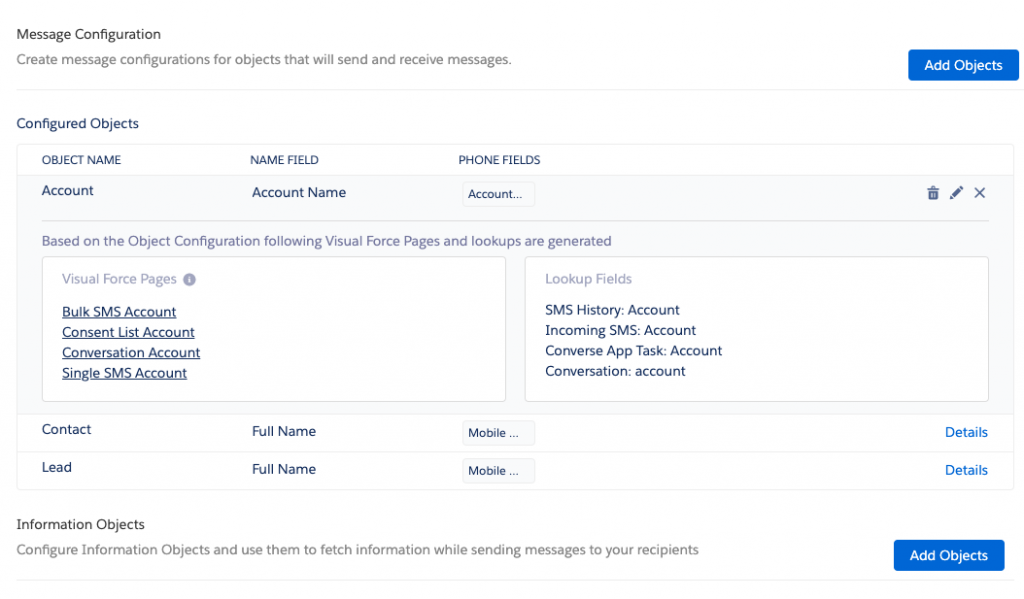
You can add objects to the Object list. The system then automatically configures the Visualforce pages. These pages are then used to create buttons, such as:
- Send SMS
- Send Bulk SMS
- Conversation View
In addition to Visualforce pages, Lookup Fields are also created for that object on SMS History, Converse App Task, and Conversation objects. These fields will be used to attach messages to a record when required by the application while building conversations. User profiles need to be provided field-level access permissions in order to refer these lookup fields while building conversations.
Users should also have access to merge/dynamic fields that are referred to in the message configuration and used in SMS templates and fields. For example, a mobile number.
To delete a Message Object or an Information Object, log in to an administrator account. You need to have the relevant permissions to perform the deletions. Deleting a Message Object or an Information Object must be carefully considered and carried out as it impacts SMS delivery throughout the application.
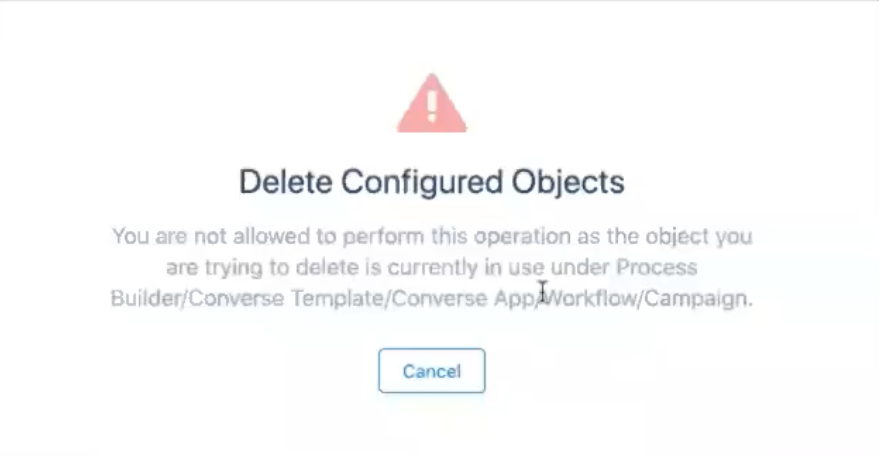
Before deleting the configuration of an object, the Admin must disable the following:
- All Automations
- Process builders
- Campaigns
1. Object Configuration
1.1 Add Objects
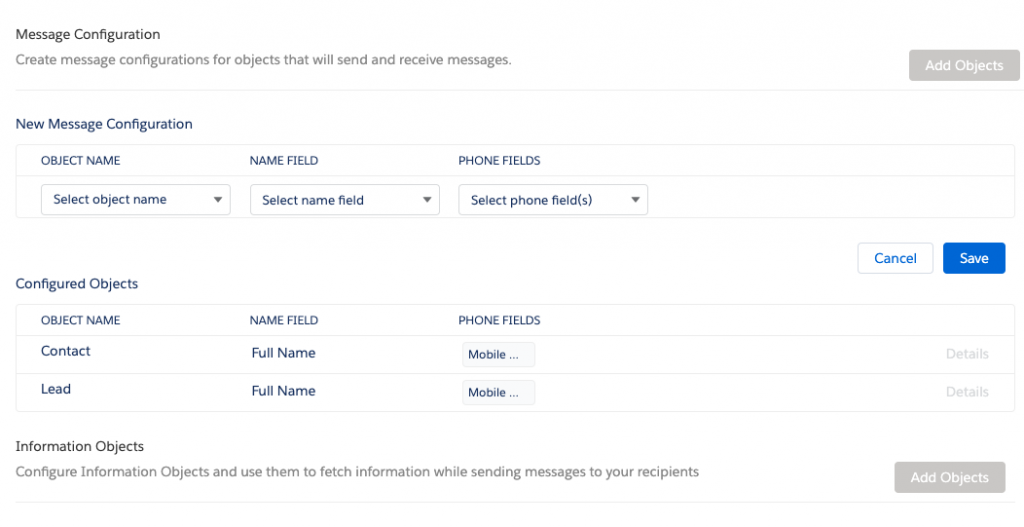
1. In the Converse Settings tab, click Message Configuration.
2. Click Add Objects.
3. Select the object name, name, and phone from the dropdown lists.
4. Click Save.
1.2 Edit Objects
1. In the Converse Settings tab, click Message Configuration.
2. Click Details next to the message object that you want to edit.
3. Click Edit icon next to the object you want to edit. The edit view appears.
4. If you want to change the name, then select a different name from the Name Field.
5. If you want to change the phone, then select a different name from the Phone Fields.
6. Click Save the following message will appear

1.3 Delete Objects
1. In the Converse Settings tab, click Message Configuration.
2. Click Details next to the message object that you want to delete.
3. Click the delete icon. The Delete Configured Objects warning window appears with the following message:
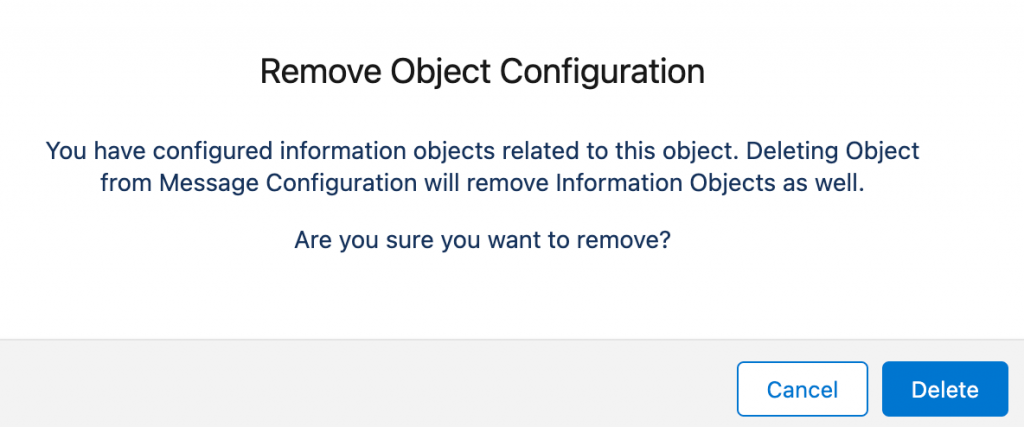
4. If there is no existing Campaign/ Workflow/Converse Template running in the background the following message will appear:
4. Click on Delete the following message will be deleted.
2. Information Object Configuration
2.1 Add Information Objects
1. In the Converse Settings tab, click Message Configuration.
2. In the Information Objects section, click Add Objects.

3. Select the information object from the Information Objects dropdown list.
4. Select the primary object that will reference the information object from the Object Name dropdown list.
5. Click Save.
2.2 Edit Information Objects
1. In the Converse Settings tab, click Message Configuration.
2. Click the Edit icon next to the object you want to edit. The edit view appears.
3. If you want to change the information object, then select a different object from the Information Object list.The Information Object value cannot be empty. You must provide at least one information object.
4. If you want to change the primary object that will reference the information object, then select a different primary object from the Object Name dropdown list.
5. Click Save.
2.3 Delete Information Objects
1. In the Converse Settings tab,click Message Configuration.
2. Click the Delete icon next to the object that you want to delete. The Delete Configuration pop-up window appears.
3. Click Delete.


