OmniChannel Integration with SMS-Magic
Objectives:
To understand the OmniChannel settings and how to integrate it with SMS Magic.
What is Omni Channel:
Omni-Channel is a flexible, customizable feature, and you can configure it declaratively—that is, without writing code. Using Omni-Channel, you can prioritize the work item and route to a specific agent with the help of a queue.
Why to use Omnichannel with SMS-Magic:
If there is a requirement to route incoming messages/conversation/records related to the messages to a set of users on real time, this could be achieved with enabling of Omni Channel.
Enable Omnichannel
1. Create QueueFirstly, you have to create a queue with required users added to it. For that, go to Setup- > Queues-> New.

- Enable Omni-Channel

- Create Service Channels

Omni-Channel currently supports routing for the following objects and records.
- Cases
- Chats
- SOS video calls
- Social posts
- Orders
- Leads
- Custom objects that don’t have a master object
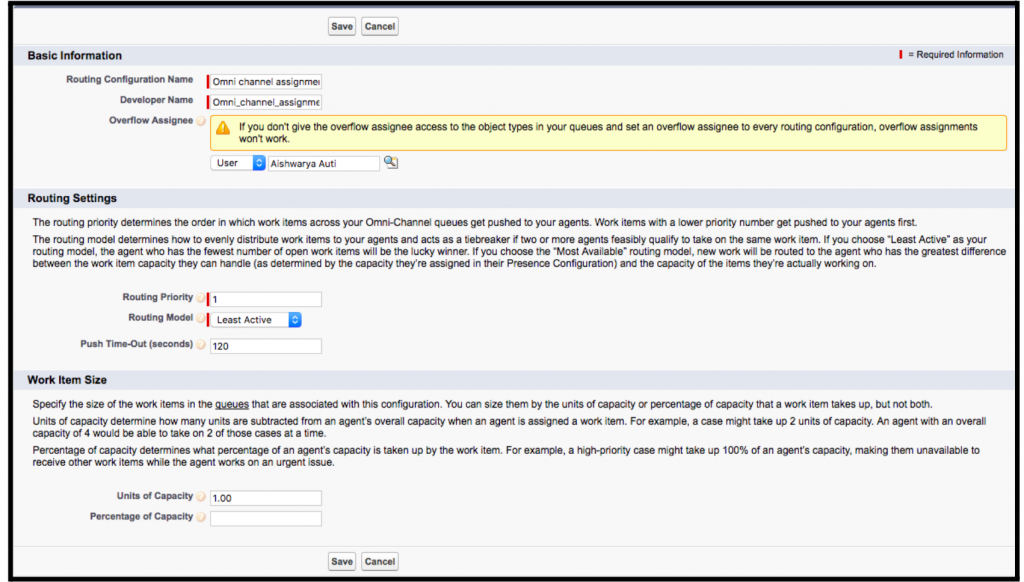
- Create Routing Configurations
- Associate Routing Configurations and Agents with Queues

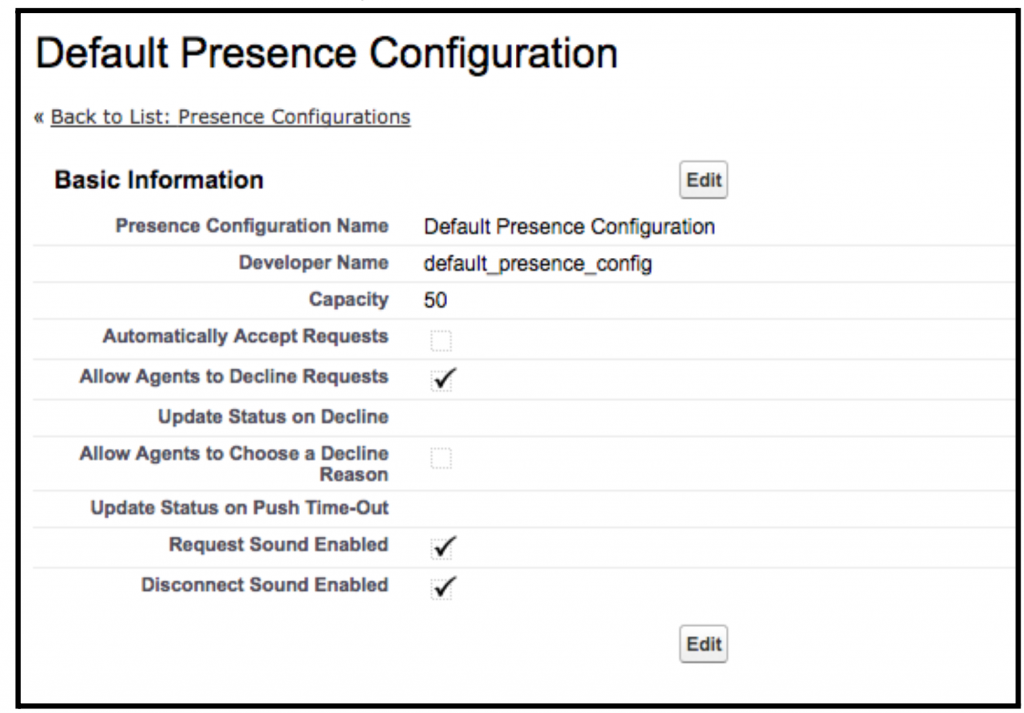
- Create Presence Configurations
- Create Presence Statuses
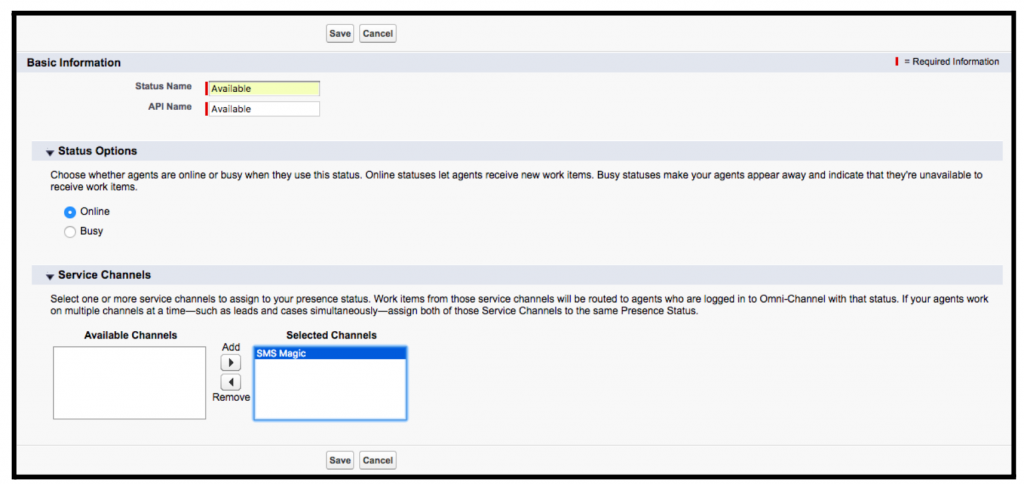
Set Access to Presence Statuses: Presence statuses indicate whether an agent is online and available to receive incoming work items, or whether the agent is away or offline.
- With permission sets
- With profiles
Add the Omni-Channel Widget to the Salesforce Console: After you get Omni-Channel all set up for your organization, it’s time to add the Omni-Channel widget to the Salesforce console so that your agents can start receiving work.
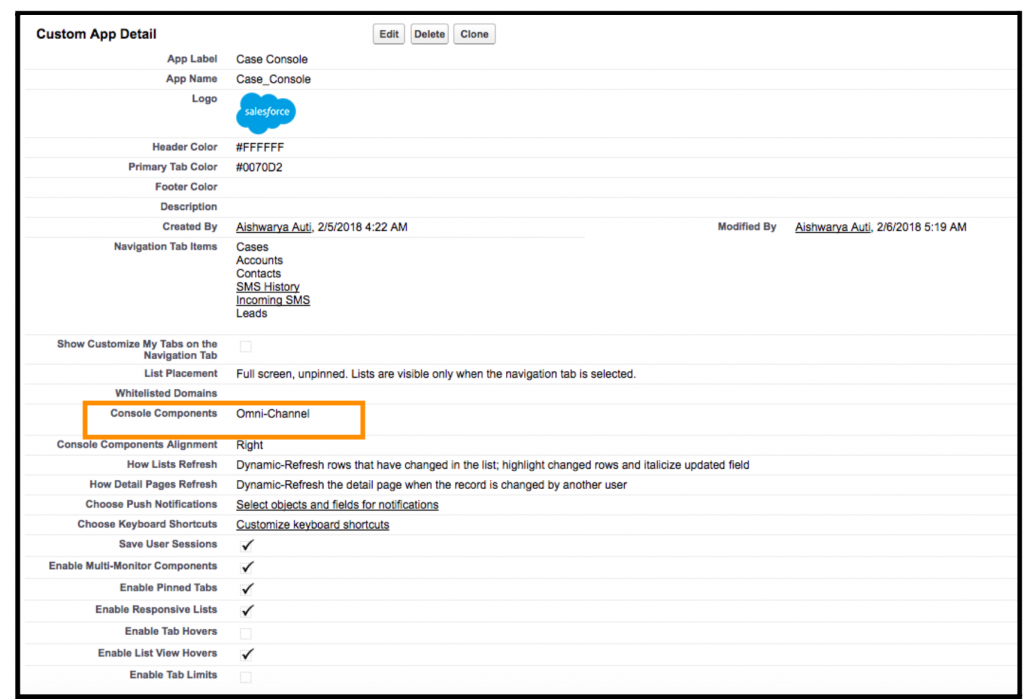
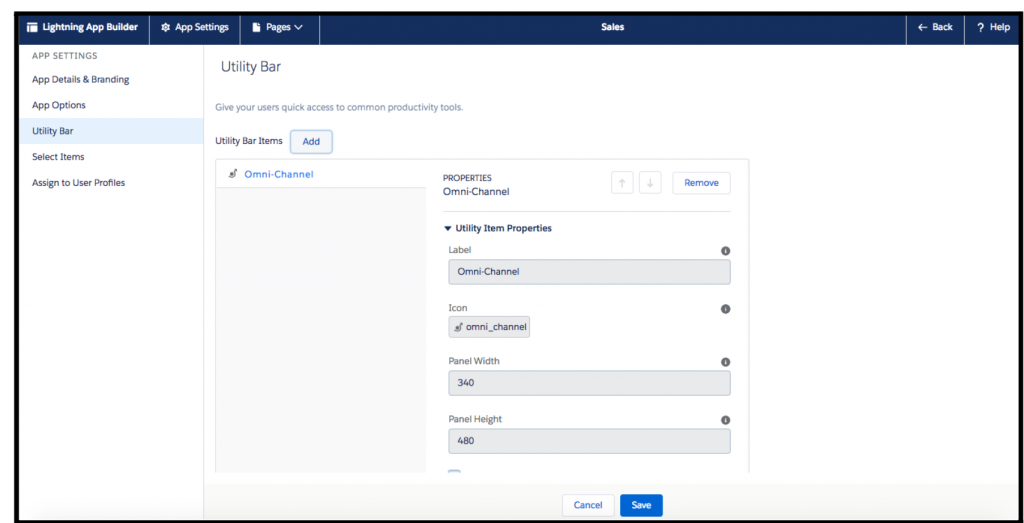
Add the Omni-Channel Utility to a Lightning Console App: Add the Omni-Channel utility to your Lightning Service console to route work to agents in a flash.


0 Comments